从iOS到微信小程序的学习心得
前言
上周微信小程序公测了,允许开发者将应用提交到微信公众平台审核,但暂时还不能发布。
微信小程序是不用下载即能使用的应用,它相比原生app更新实时、跨平台、开发成本低、使用门槛低,一经宣布,便受到业内的强烈关注。最近动手尝试了下微信小程序。
这篇文章将继续以iOS开发的视角介绍微信小程序的开发心得。
项目结构
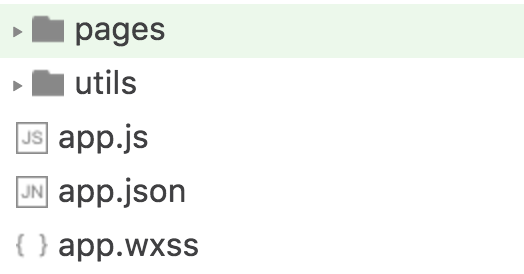
首先介绍一下小程序的结构目录:
按官方文档的说明,app.js用于处理小程序逻辑,用于监听小程序的生命周期、声明全局变量。app.wxss用于管理小程序公共样式,app.json文件用来对微信小程序进行全局配置,决定页面文件的路径、窗口表现、设置网络超时时间、设置多 tab 等。在iOS中,相当于AppDelegate类。
如下所示,pages设置页面路径,window设置默认页面的窗口表现,tabbar设置底部 tab 的表现,networkTimeout设置网络超时时间,debug设置是否开启 debug 模式。
{
  "pages": [
    "pages/index/index",
    "pages/logs/index"
  ],
  "window": {
    "navigationBarTitleText": "Demo"
  },
  "tabBar": {
    "list": [{
      "pagePath": "pages/index/index",
      "text": "首页"
    }, {
      "pagePath": "pages/logs/logs",
      "text": "日志"
    }]
  },
  "networkTimeout": {
    "request": 10000,
    "downloadFile": 10000
  },
  "debug": true
}
每个页面又是由.js、.wxml、.wxss、.json文件构成,.js是页面逻辑,.wxml处理页面结构,.wxss处理页面样式,.json处理页面配置。
生命周期
小程序的生命周期如下图

在iOS中,onLaunch方法类似于application:didFinishLaunchingWithOptions:,onHide类似于applicationDidEnterBackground:,onShow类似于applicationWillEnterForeground:
页面的生命周期如下
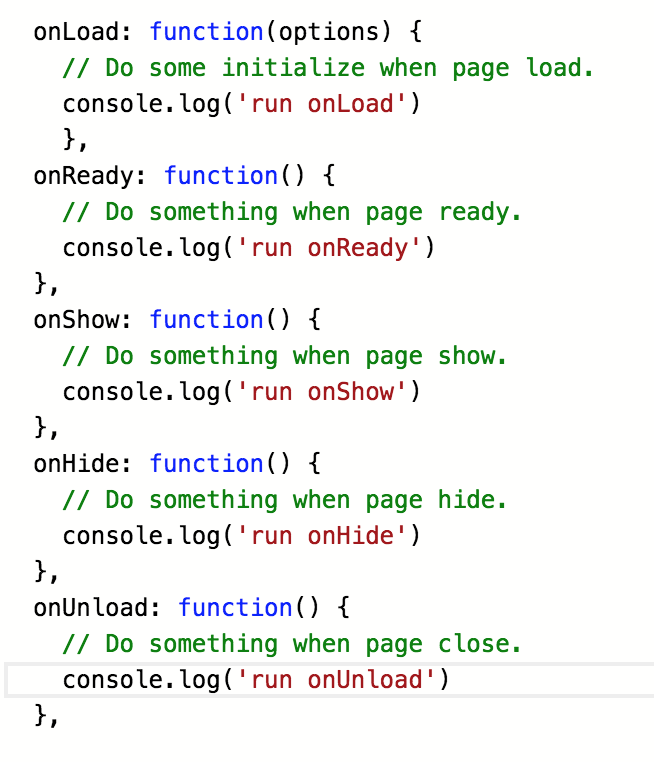
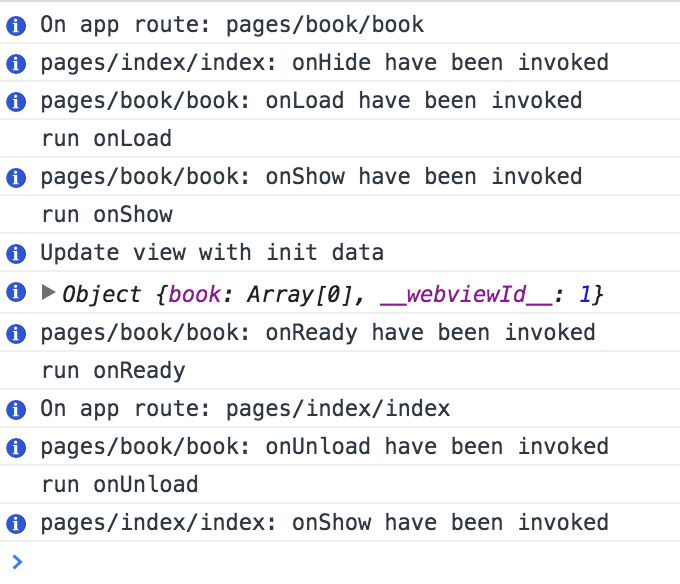
onLoad相当于loadView,onReady相当于viewDidLoad,onShow相当于viewDidApear:,onUnload相当于viewDidDisappear:。与iOS不同的是,小程序先调用onShow方法再调用onReady,onHide表示页面隐藏,当navigateTo或底部tab切换时调用。
页面跳转
小程序的页面中转比较简单,主要有三个方法:
wx.navigateTo(OBJECT):保留当前页面,跳转到应用内的某个页面,使用wx.navigateBack可以返回到原页面。相当于iOS中的push跳转。
wx.redirectTo(OBJECT):关闭当前页面,跳转到应用内的某个页面。
wx.navigateBack():关闭当前页面,回退前一页面。相当于iOS中的pop返回。
数据绑定
小程序有一套UI与数据的绑定机制,有点类似MVVM模式,它是单向绑定的,只能从Data更新到View,而且要手动调用setData方法才能更新view。
语法类似这样,在.wxml文件中用双大括号将变量包起来,在.js文件中修改数据,调用setData方法,UI根据这个数据的最新结果刷新。
//page.wxml
<view> {{ message }} </view>

//page.js
Page({
  data: {
    message: ''
  },
  onLoad: function(options) {
    this.setData({
      message:'Hello world'
    })
  }
})
小程序的数据绑定还支持表达式,如条件表达式、算术表达式、字符串表达式、三元表达式。
//用 wx:if="{{condition}}" 来判断是否需要渲染该代码块:
<view wx:if="{{condition}}"> True </view>

//wx:for控制属性绑定一个数组,即可使用数组中各项的数据重复渲染该组件。
<view wx:for="{{array}}">
  {{index}}: {{item.message}}
</view>
豆瓣科幻小说demo
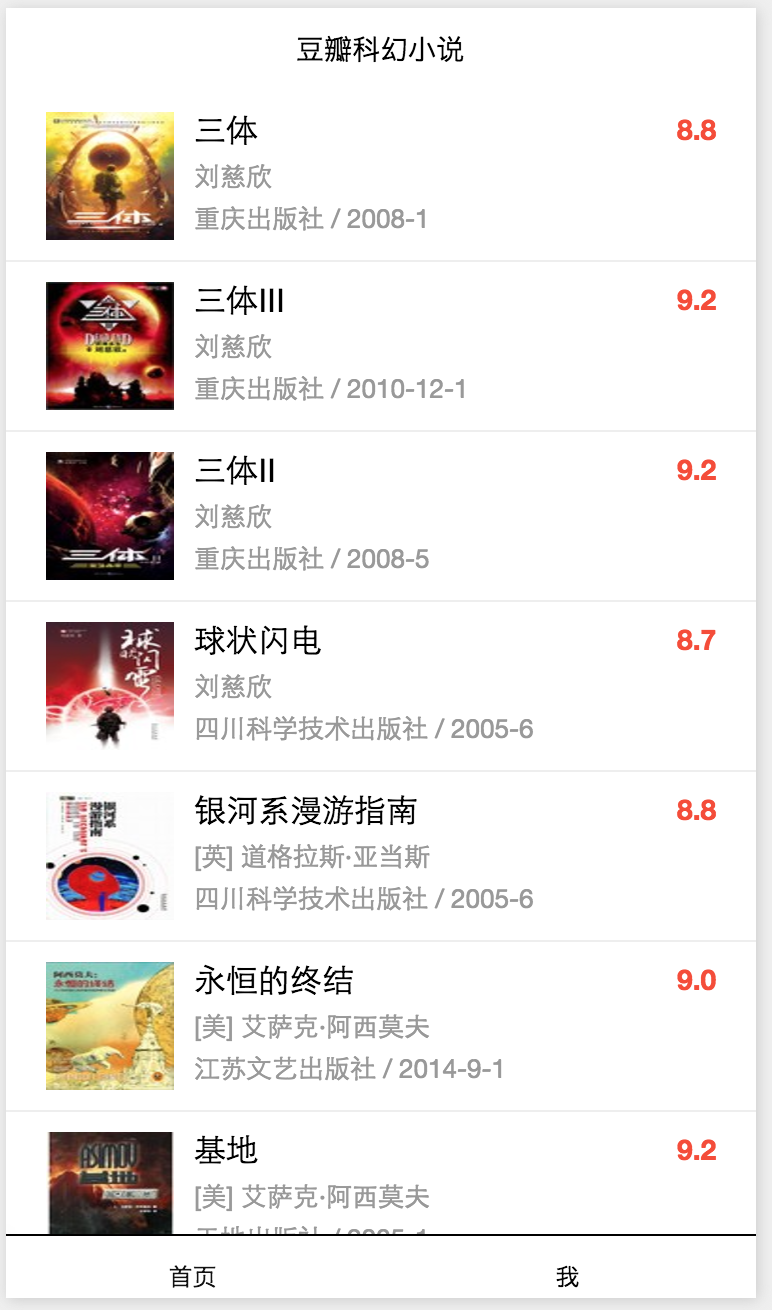
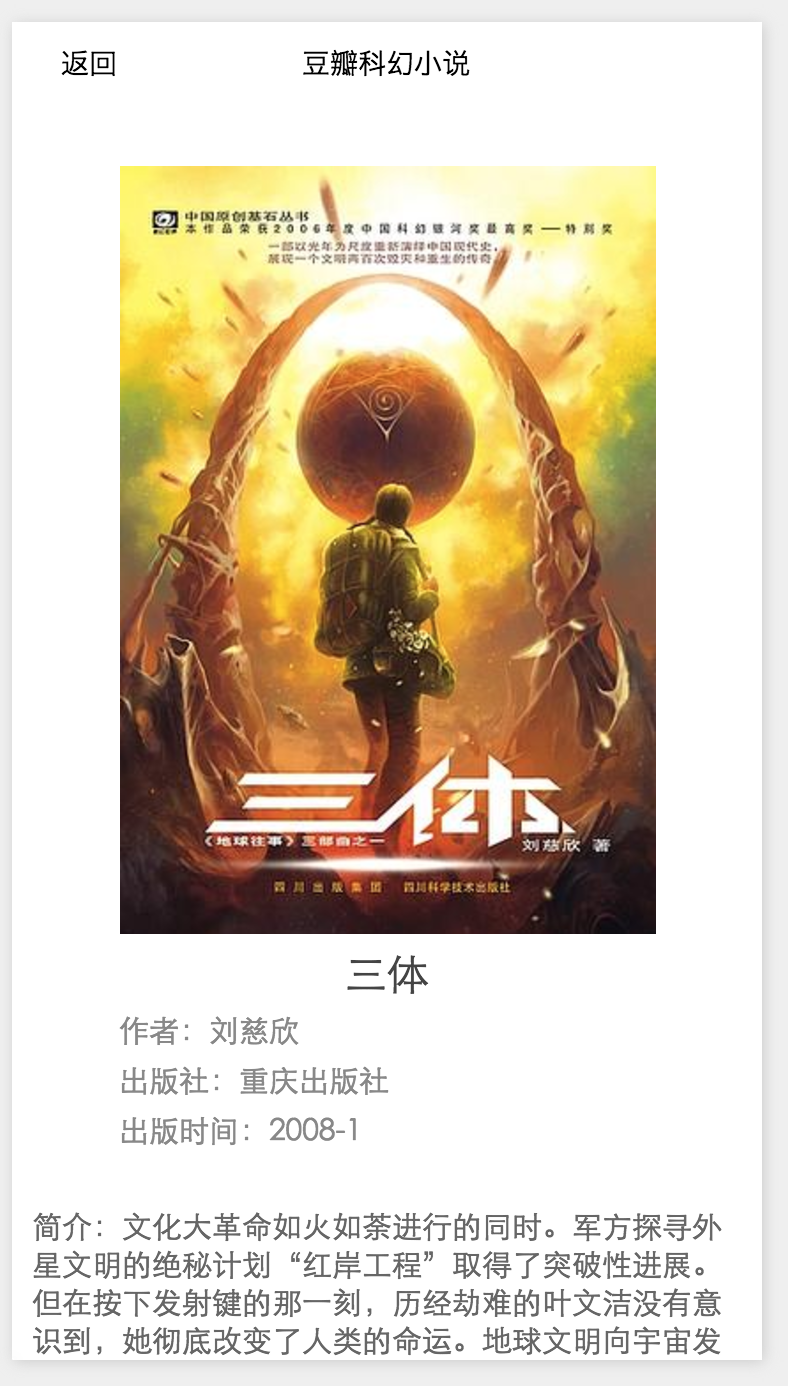
接下来我们一起写一个小程序demo。效果如下:
demo搭建与配置
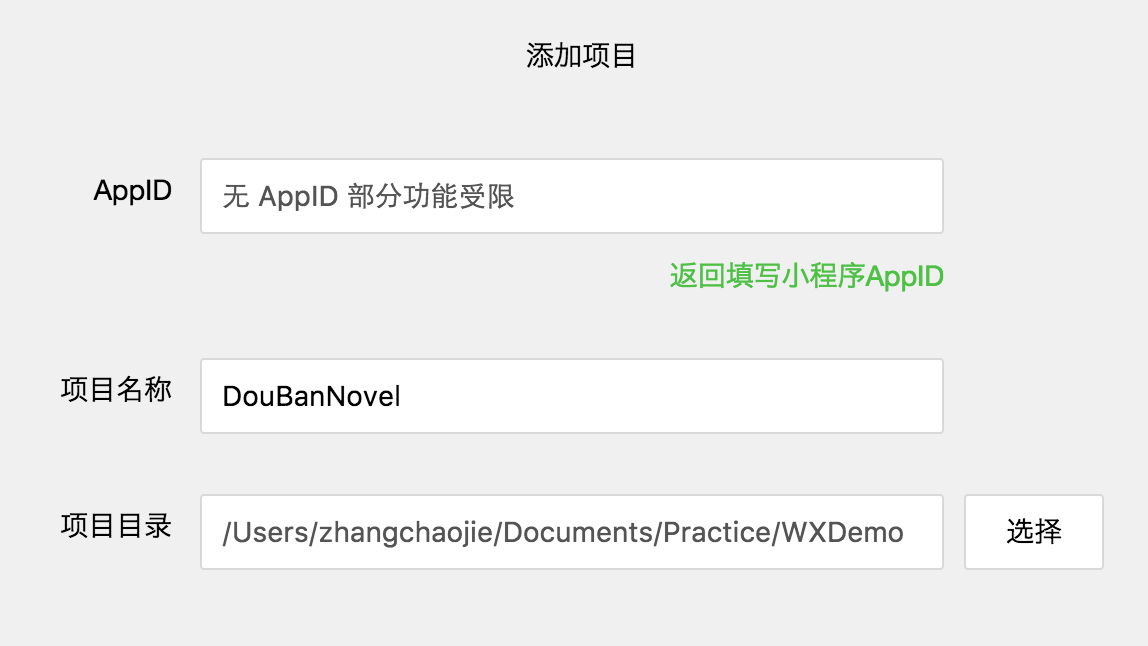
首先创建项目,设置项目名称,选择项目位置,这里选择了无Appid
创建两个页面,一个主页index和一个详情页book

在app.json文件中对app进行配置,在pages属性中,添加文件路径,路径是相对位置。在window属性中,设置窗体的颜色、标题等。
{
  "pages":[
    "pages/index/index",
    "pages/book/book"
  ],
  "window":{
    "navigationBarBackgroundColor": "#ffffff",
    "navigationBarTextStyle": "black",
    "navigationBarTitleText": "豆瓣科幻小说",
    "backgroundColor": "#eeeeee",
    "backgroundTextStyle": "light"
  },
  "tabBar": {
    "color":"#030303",
    "selectedColor":"#111",
    "backgroundColor":"#fff",
    "borderStyle":"black",
    "list":[{"pagePath":"pages/index/index",
    "text":"首页"},
    {"pagePath":"pages/index/me",
    "text":"我"}]
  },
  "networkTimeout":{
    "request":10000,
    "downloadFile":10000
  },
  "debug":true
}
我们从豆瓣api中获取科幻小说列表数据,不像iOS取数据那么麻烦,小程序提供了简单的api进行网络通信,而且也不用建立model,取到的数据直接使用。看首页代码,data内的几个键值对相当于变量初始化,如books表示存放书籍的数组,当onLoad页面加载完成后向网络请求数据,这里获取科幻小说列表,拿到数据后调用setData更新当前页面。
var app = getApp()
var API_URL = "https://api.douban.com/v2/book/search"
Page({
  data: {
    size: 100,
    title: "数据加载中...",
    books: [],
    loading: true
  },

  onLoad: function() {
    var _this = this
    console.log(_this.data)

    var params = {
      tag: "科幻",
      start: 0,
      count: _this.data.size
    }

    wx.request({
      url: API_URL,
      data: params,
      method: 'GET', // OPTIONS, GET, HEAD, POST, PUT, DELETE, TRACE, CONNECT
            header: {"Content-Type":"application/json"},
      success: function(res){
        // success
        _this.setData({
         books: res.data.books,
         loading: false
        })
      },
      fail: function() {
        // fail
      },
      complete: function() {
        // complete
      }
    })
  },

})
在index.wxml中,放置加载动画loading和滚动组件scroll-view,加载动画绑定了loading属性,决定是否显示或隐藏。navigator表示点击即重定向到书籍详情页,相当于push到详情页。\<view class="item"\>相当于cell,cell内的每个控件都绑定book,当books更新时,刷新UI。
<loading hidden="{{!loading}}">
    {{title}}
</loading>

<scroll-view scroll-y="true" class="page-body" >
    <navigator url="../book/book?id={{item.id}}" wx:for="{{books}}">
        <view class="item">
            <image class="poster" src="{{item.images.small}}"></image>
            <view class="meta">
                <text class="title">{{item.title}}</text>
                <view class="author">
                    <text wx:for="{{item.author}}">{{item}}</text>
                </view>
                <text class="subtitle">{{item.publisher}} / {{item.pubdate}}</text>
            </view>
            <view class="rating">
                <text>{{item.rating.average}}</text>
            </view>
        </view>
    </navigator>

</scroll-view>
index.wxss是样式表文件,控制首页的布局和样式。css布局不熟悉,跟iOS差别还是比较大的,需要多写一些。
page {
  font-family: -apple-system-font, 'Helvetica Neue', Helvetica, 'Microsoft YaHei', sans-serif;
  font-family:;
  background-color: #fff;
  display: flex;
  flex-direction: column;
}

.page-header {
  display: flex;
  justify-content: center;
  border-bottom: 1rpx solid #ccc;
}

.page-header-text {
  padding: 20rpx 40rpx;
  color: #999;
  font-size: 38rpx;
  text-align: center;
}

.page-body {
  display: flex;
  flex: 1;
  flex-direction: column;
  height: 100%;
}

.item {
  display: flex;
  padding: 20rpx 40rpx;
  border-bottom: 1rpx solid #eee;
  cursor: pointer;
}

.item .poster {
  width: 128rpx;
  height: 128rpx;
  margin-right: 20rpx;
}

.item .meta {
  flex: 1;
}

.item .meta .title,
.item .meta .sub-title {
  display: block;
  margin-bottom: 15rpx;
}

.item .meta .title {
  font-size: 32rpx;
}

.item .meta .sub-title {
  font-size: 22rpx;
  color: #c0c0c0;
}

.item .meta .subtitle {
  font-size: 26rpx;
  color: #999;
}

.item .meta .author {
  font-size: 26rpx;
  color: #999;
}

.item .rating {
  font-size: 28rpx;
  font-weight: bold;
  color: #f74c31;
}

.tips {
  font-size: 28rpx;
  text-align: center;
  padding: 50rpx;
  color: #ccc;
}

.tips image {
  width: 40rpx;
  height: 40rpx;
  margin-right: 20rpx;
}

.tips image,
.tips text {
  vertical-align: middle;
}
书籍详情页跟列表页比较类似,也更简单,就不贴代码了,具体看demo,demo已上传github:https://github.com/superzcj/DouBanNovelDemo
总结
在iOS开发中,MVVM其实很少用的,不过写了这个小程序demo,发现MVVM还是挺棒的,代码写的更简洁、优雅。小程序比较轻量,相对iOS开发还是挺简单的,很多功能都被封装,比如tabbar的配置、网络api的使用以及json的直接使用,这样开发就更简单,更容易快速出产品。
作为一个iOS开发,对前端开发不熟悉,文章中难免有错误有不足,希望大家多多指正。
如果觉得我的这篇文章对你有帮助,请在下方点个赞支持一下,谢谢!
