微信小程序抽奖-翻牌
背景
ps:本次开发基于wepy框架
由于最近接到一个需求--抽奖活动;
翻牌打乱活动抽奖活动,大概需求是这样的,九宫格卡牌,先正面展示所有奖品,然后卡牌翻转,打乱排序,点击卡牌,然后抽奖。
这个需求本身其实不难,主要是分为三步;
- 展示所有卡牌,然后翻转。
- 打乱所有卡牌
- 点击其中一张卡牌,抽奖
第一步:卡牌翻转
我们先在dom中渲染9个卡牌。
-
<view class="card-module">
<view class="card {{showClass ? 'change' : ''}}>
<view class="front card-item">{{cardItem.front}}</view>
<view class="back card-item">{{cardItem.back}}</view>
</view>
</repeat>
</view>
在数据中生成模拟卡牌数据
-
cardData: [
{
animationData: {},
front: '正面1',
back: '反面1'
},
...
...
{
animationData: {},
front: '正面9',
back: '反面9'
}
],
showClass: false,
在样式中把卡牌的基本样式渲染出来
-
.card-module{
padding: 45rpx;
display: flex;
flex-direction: row;
flex-wrap: wrap;
transform:translate3d(0,0,0);
.card{
width: 200rpx;
height: 200rpx;
line-height: 200rpx;
text-align: center;
color: #fff;
margin: 10rpx;
position:relative;
overflow:hidden;
.card-item{
position:absolute;
left:0;
top:0;
width:100%;
height:100%;
transition:all .5s ease-in-out;
transform-style:preserve-3d;
backface-visibility:hidden;
box-sizing:border-box;
}
.front{
background-color: red;
transform: rotateY(0deg);
z-index:2;
}
.back{
background-color: #009fff;
transform: rotateY(180deg);
z-index:1;
}
}
.card.change{
.front{
z-index:1;
transform: rotateY(180deg);
}
.back{
z-index:2;
transform: rotateY(0deg);
}
}
}
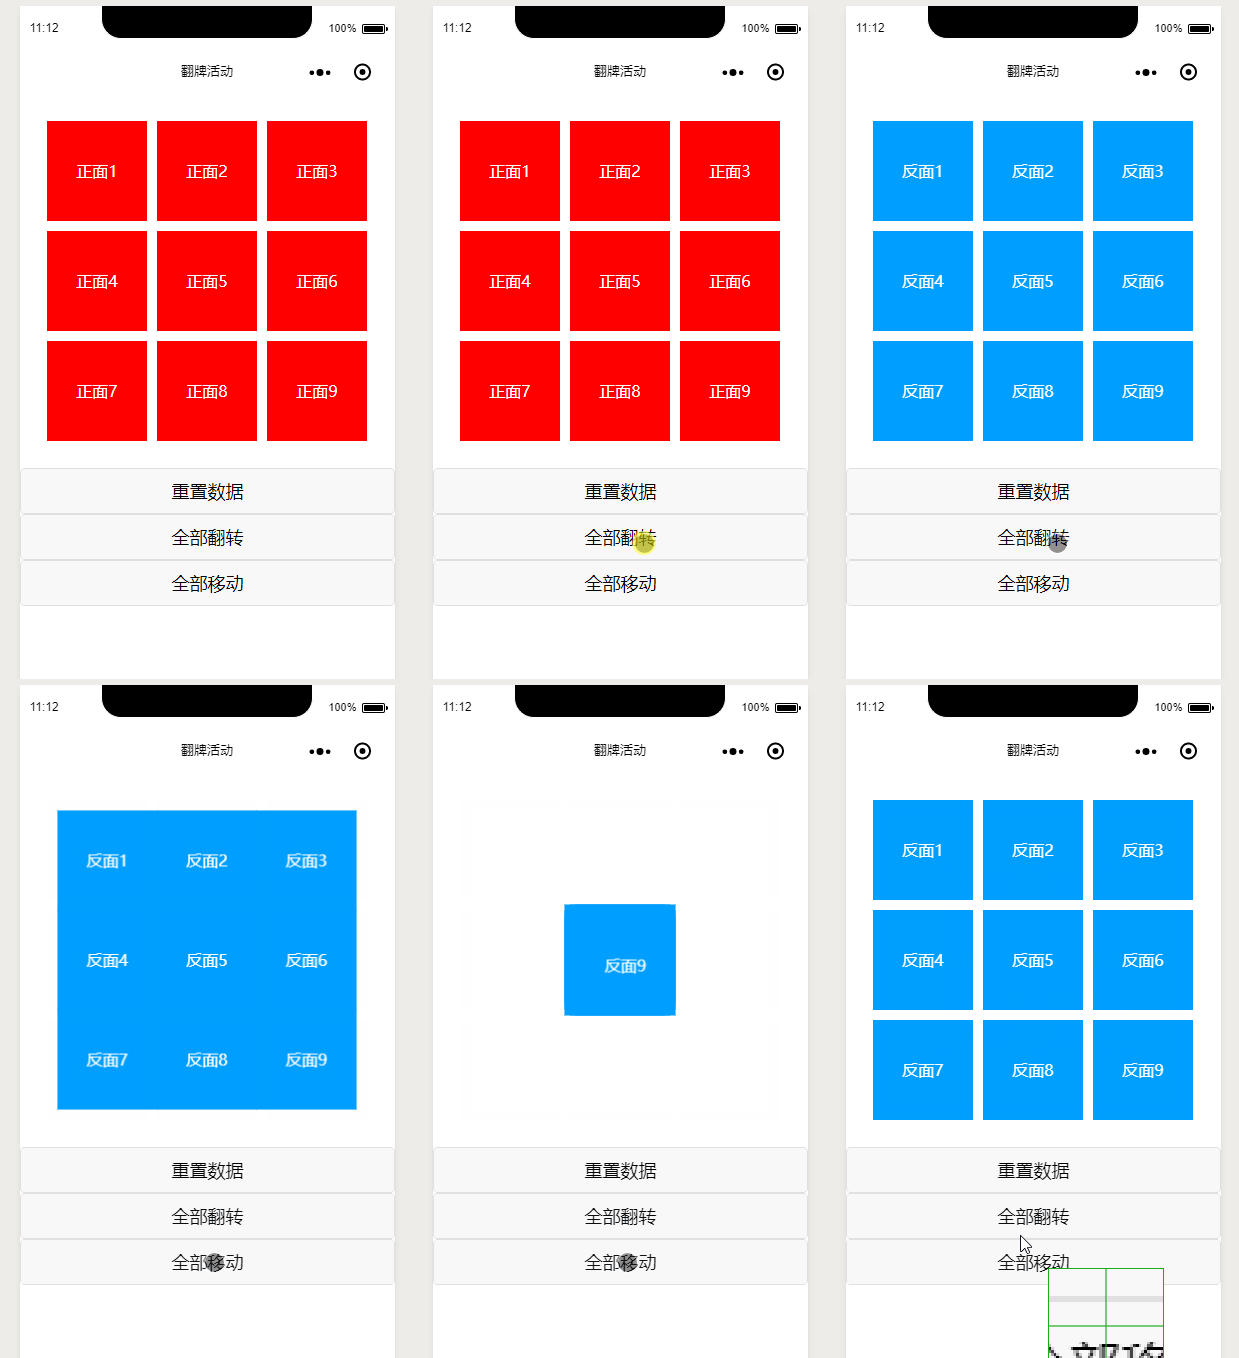
效果如下
这里有些css属性可能需要大部补充学习一下
css3 backface-visibility 属性
定义和用法 backface-visibility 属性定义当元素不面向屏幕时是否可见。 如果在旋转元素不希望看到其背面时,该属性很有用。
CSS3 perspective 属性
perspective 属性定义 3D 元素距视图的距离,以像素计。该属性允许您改变 3D 元素查看 3D 元素的视图。 当为元素定义 perspective 属性时,其子元素会获得透视效果,而不是元素本身。
第二步:卡牌打乱
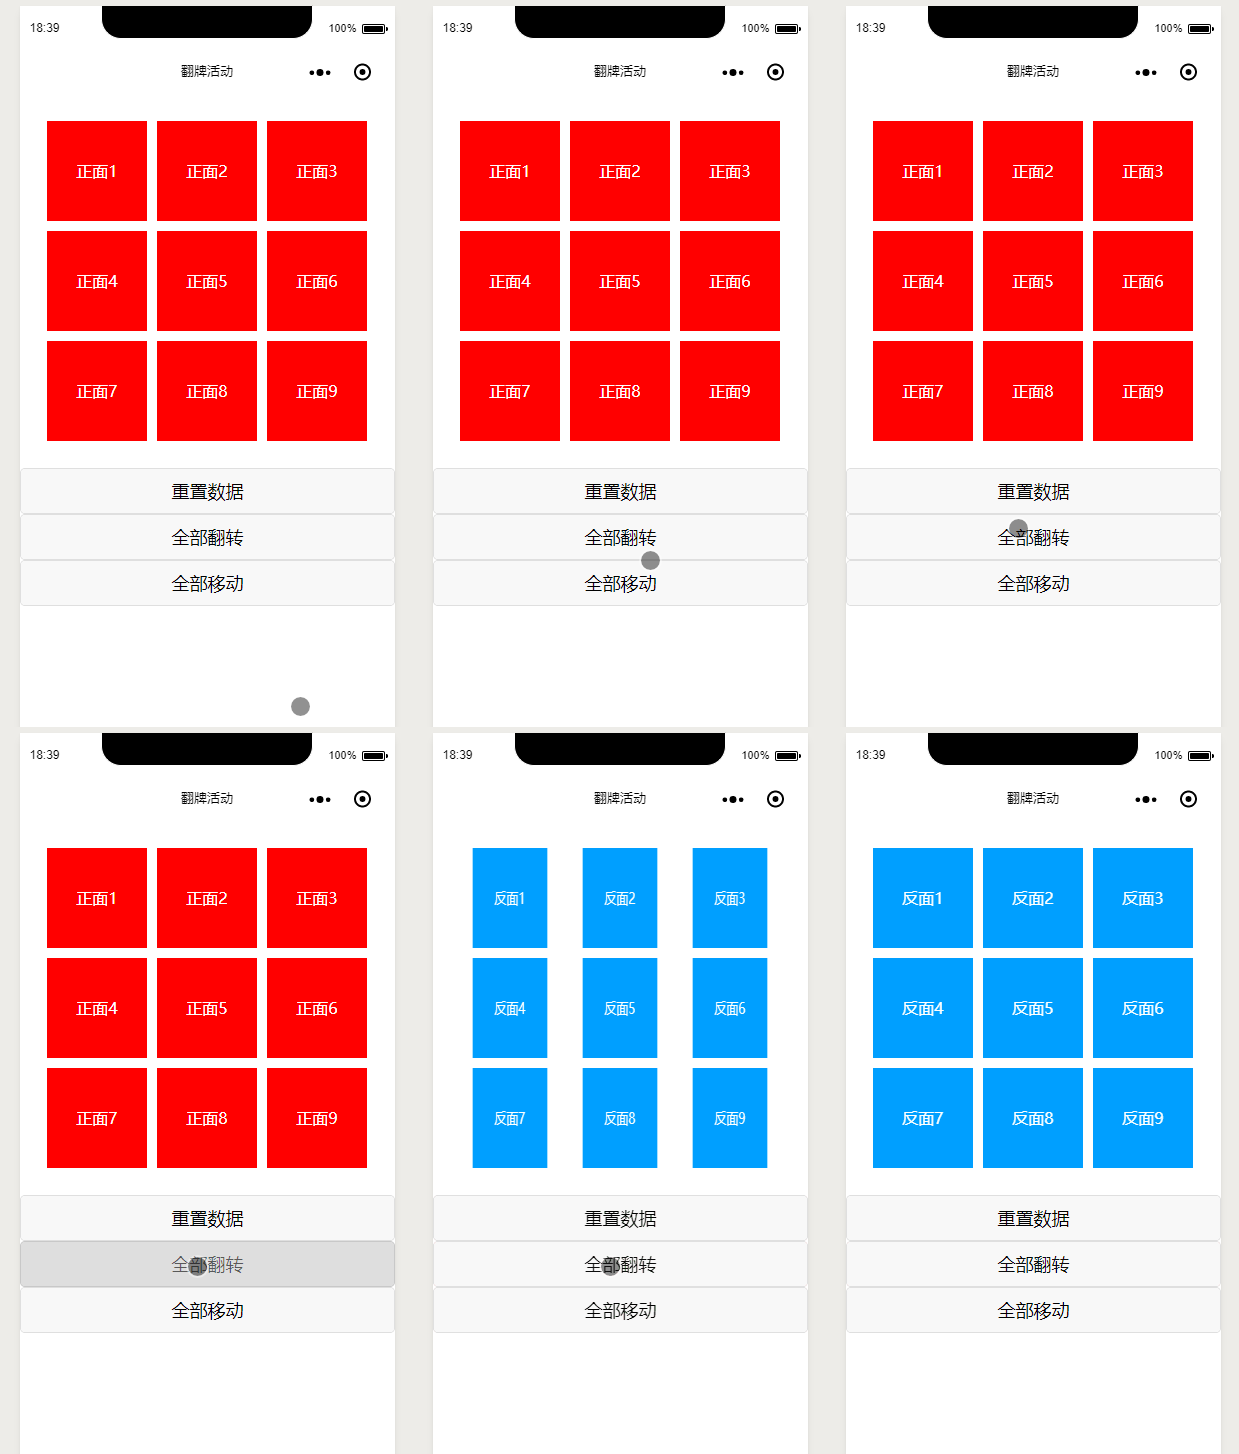
由于业务上是抽奖使用的,所以选择的方案是:翻转后,卡牌收回到中间的卡牌中间,然后再让卡牌回到原来的位置。 关于小程序的原生框架有支持的动画接口,若不了解的请前往: developers.weixin.qq.com/miniprogram… 在对动画有基本了解之后,我们可以开始在翻转的基础上加上打乱的动画了 微信小程序的动画接口使用方式是在dom对象上面加上animation对象。 dom
-
<view class="card-module">
<view class="card {{showClass ? 'change' : ''}} animation="{{cardItem.animationData}}" >
<view class="front card-item">{{cardItem.front}}</view>
<view class="back card-item">{{cardItem.back}}</view>
</view>
</repeat>
</view>
script
-
allMove () {
// 110 是卡牌宽度加边距
this.methods.shuffle.call(this, 110)
let timer = setTimeout(() => {
clearTimeout(timer)
this.methods.shuffle.call(this, 0)
this.$apply()
}, 1000)
},
// 洗牌
shuffle (translateUnit) {
let curCardData = this.cardData
curCardData.map((item, index) => {
let animation = wepy.createAnimation({
duration: 500,
timingFunction: 'ease'
})
animation.export()
switch (index) {
case 0:
animation.translate(translateUnit, translateUnit).step()
break
case 1:
animation.translate(0, translateUnit).step()
break
case 2:
animation.translate(-translateUnit, translateUnit).step()
break
case 3:
animation.translate(translateUnit, 0).step()
break
case 4:
animation.translate(0, 0).step()
break
case 5:
animation.translate(-translateUnit, 0).step()
break
case 6:
animation.translate(translateUnit, -translateUnit).step()
break
case 7:
animation.translate(0, -translateUnit).step()
break
case 8:
animation.translate(-translateUnit, -translateUnit).step()
break
}
item.animationData = animation.export()
})
this.cardData = curCardData
this.$apply()
},
算法后面需要优化,我们先完成功能效果, 效果如下

第三步:卡牌翻转
dom代码
-
<view class="card-module">
<view class="card {{showClass ? 'change' : ''}} {{curIndex === index ? 'getprize' : ''}}" @tap="itemChage({{cardItem}}, {{index}})" animation="{{cardItem.animationData}}" >
<view class="front card-item">{{cardItem.front}}</view>
<view class="back card-item">{{cardItem.back}}</view>
</view>
</repeat>
</view>
script代码
-
data中定义一个curIndex = -1的对象
data = {
curOpen: -1,
}
methods = {
// 抽奖
itemChage (item, curIndex) {
this.cardData[curIndex].front = 'iphone x'
console.log(item, curIndex)
this.curOpen = curIndex
}
}
less
-
.card.getprize{
.front{
z-index:2;
transform: rotateY(0deg);
}
.back{
z-index:1;
transform: rotateY(180deg);
}
}
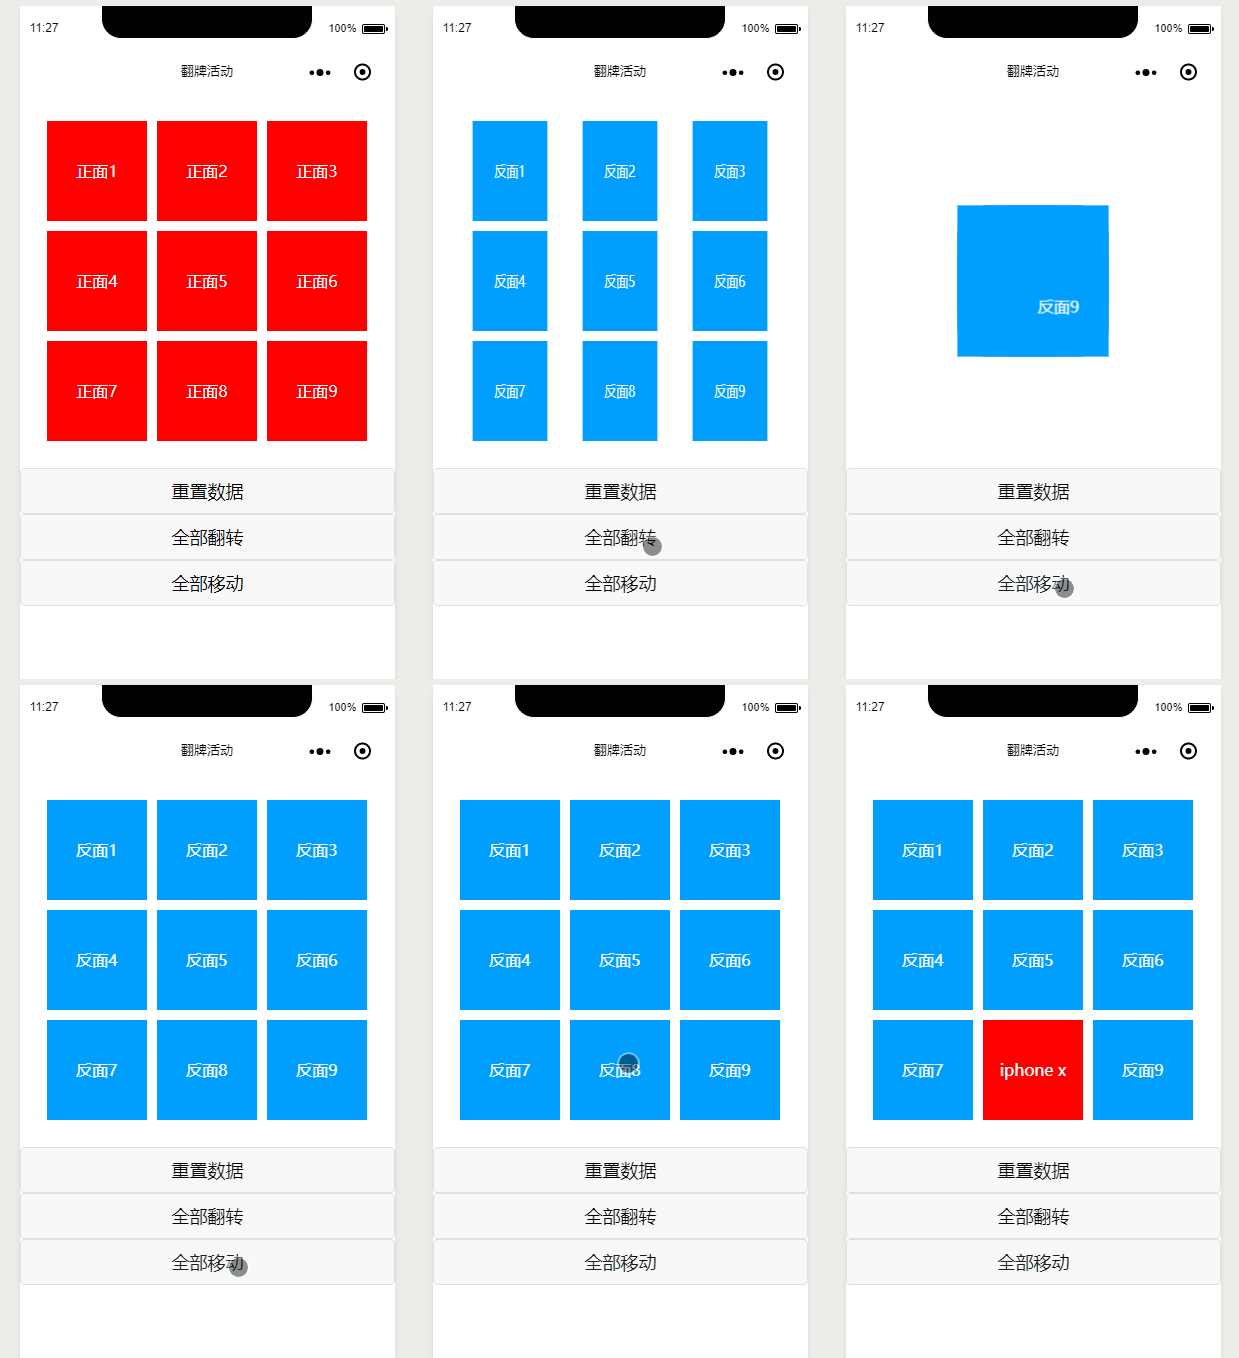
效果如下

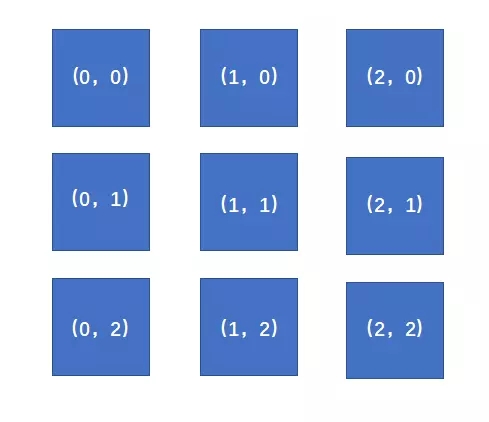
现在我们就已经完成了基本的需求;但是在位移动画时候代码写的太丑陋了。 我们来想想怎么优化算法; 我们现在就九宫格布局,我们可以看成是二维布局

那我们是不是可以在卡牌中也使用二维数组布局属性
-
resetData () {
const total = 9 // 总数
const lineTotal = 3 // 单行数
curCardData.map((item, index) => {
let curCardData = this.cardData
let x = index % lineTotal
let y = parseInt(index / lineTotal)
item.twoArry = {x, y}
})
}
在位移动画中使用二维布局的差值进行位移
-
// 洗牌
shuffle (translateUnit) {
let curCardData = this.cardData
curCardData.map((item, index) => {
let animation = wepy.createAnimation({
duration: 500,
timingFunction: 'ease'
})
animation.export()
const translateUnitX = translateUnit * (1 - item.twoArry.x)
const translateUnitY = translateUnit * (1 - item.twoArry.y)
animation.translate(translateUnitX, translateUnitY).step()
item.animationData = animation.export()
})
this.cardData = curCardData
this.$apply()
},


